In this tutorial I will talk about blending image together to create a seamless effect for any kind of image and fanart that is easy to use for anyone one from beginners and advanced users alike. This tutorial shows you two methods of blending that work perfectly on their own or used together to create an advanced level of blending.
First Part to BOTH Methods
OK so lets start, firstly pick your images, I like to use large images that way you can minimize them and sharpen then, if you use smaller images you loose quality when you enlarge them. I have chosen two pictures of Brendan Fehr star of Roswell. if you want to use these images to test out this tutorial or you like Brendan Fehr you can get them from these links Image One || Image Two
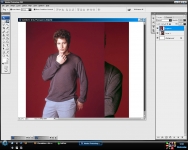
Create a New canvas any size, I tend to use wallpaper sizes 1024×768 or 1280×1024 it gives you a large area to work with an you can always crop it later. Copy and paste both images into the same canvas and arrange them where you like. (as you know Photoshop uses layers so when you copy and paste the images onto the canvas they’ll be separate layers this is good as you’ll see later.
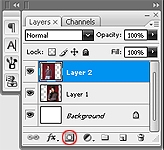
Now look at your Layer pallet that can be found on the right hand side of your workspace, if you look at the bottom of that pallet you will see a square with a white circle, this is the layer mask button. A layer mask basically allows you to control different areas of the present area in this instance it will help us to control the opacity of certain areas of the images.
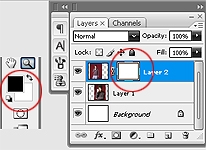
Once you press the layer mask button you should notice that a white box has appeared next to your selected layer and also your colour pallet (on the left hand side of your workspace) ha changed to black and white. This is because the layer mask relyes on the black and white tones to tell it weather to delete or show the areas. Black = 0% opacity (Delete) white = 100% opacity (Show)
Method One
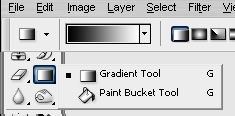
Ok now onto the first method. With this one we are going to use the gradient tool, you have to make sure that the colours don’t change from black and white. Using this method is the easiest way to create a smooth fade, it is best to use this method if want a gradual fade.
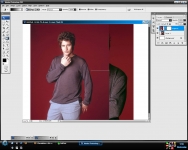
Now that you have your gradient tool selected click and drag your cursor across the area you want to fade. (remember that black means hide. if you suddenly find you’ve deleted the the side you want to keep just reverse the direction you drag your cursor. )
This is how it looks with a gradual fade, this is just the first time you can repeat this several times to get it the right way, but notice how even the fade is on the images, this is useful if you want to blend images rather than manipulate images to make them look like they are the same image.
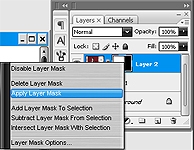
To repeat this action you will need to finalize each action, you can do this by right clicking on the gray box next to the selected layer (in the layer pallet) and select “Apply Layer Mask” then repeat the layer mask and the gradient drag to create a new fade on the image.
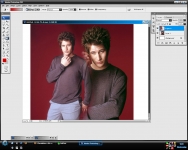
once you repeat the action a few more times you could come up with something a bit like this, however this is just a quick example, if you spend more time over your placement of the gradients you can make it seamless.
Method Two
Ok now onto the next method, in this way we are going to use the paintbrush tool. Select the paintbrush remembering that black means delete and white means show, you can also change the opacity on the paintbrush by looking at the options tool bar found at the top of your workspace, by changing the opacity you can get a gradual fade, you can also use different styles of brushes, as long as you remember black means delete and white means show.
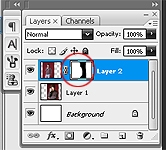
So paint over the area you don’t want to keep, and if you look at the layer pallet again it should look similar to this where the black area shows the area you have just deleted.
As you can see this provides a more precise way of deleting unwanted areas, I use this method to make images look like they are the same image (photo manipulation) I find it easier to use this one when I know the specific areas I want to get rid of rather than a general blend.

